Finish the cleanout first, then move in order: deep clean and repairs, staging, professional photos, list. Build in a minimum buffer of 7 to 14 days for standard timing, longer if probate or major repairs are involved. Focus your budget on three things that actually move buyers: a genuine deep clean, a few targeted staging anchors like rugs and one furnished vignette, and professional photography.
TL;DR:
- Complete the house cleanout well in advance to allow enough time for deep cleaning, repairs, staging, and professional photos, typically adding at least 7 to 14 days.
- Focus staging efforts on entry, living rooms, kitchen, and primary bedrooms, using minimal furniture, neutral decor, and consistent lighting to appeal to buyers.
- Prioritize fixing cosmetic issues during deep clean and repair stages, while addressing structural problems like water damage or electrical issues with licensed professionals before staging.
- Use targeted physical or virtual staging for the most important rooms and consider a hybrid approach to optimize budget and online presentation.
- Start with a donation-first cleanout to reduce clutter faster, document everything for probate, and streamline the transition to staging with fewer surprises and a quicker turnaround.
Table of Contents
- What Is the Right Sequence for Staging After Cleanout?
- What Should You Check Before the Stager Arrives?
- Where Should Staging Focus Room by Room?
- Should You Choose Full, Partial, or Virtual Staging?
- Who Do You Call First, and What Should You Keep?
- How Does a Donation-First Cleanout Speed Up Staging?
- What Belongs on Your Room-by-Room Staging Checklist?
- How Do You Improve Curb Appeal After a Cleanout?
- What Staging Mistakes Cost Sellers the Most?
- How Do You Neutralize Odors and Improve Ambiance After a Cleanout?
- How Should You Handle Repairs Found During the Cleanout?
- A Note From Derek
- How Bereavement Cleanout Services Prepares a House for Staging
- Sources
What Is the Right Sequence for Staging After Cleanout?
The order matters more than most sellers realize. Staging before repairs or a deep clean almost always means paying for a reshoot, because scuffed walls and dusty baseboards show up in every photo a stager's furniture doesn't cover. The correct pre-listing sequence runs cleanout, deep clean, repairs and paint, staging, then photography, then listing. Each step depends on the one before it being fully done, not partially done.
A realistic timeline for a standard sale looks like this:
- Complete the full cleanout well before your target listing date to allow sufficient time for follow-up steps.
- Handle deep cleaning and paint touch-ups several days before the photo shoot.
- Bring in staging, physical or virtual, a few days before photography.
- Book photography as the final step, once every room is camera-ready.
Compressed timelines are possible. If you need a one-day turnover, coordinate cleanout crews, cleaners, and a stager on back-to-back days rather than the same day, and shift to virtual staging to skip the furniture delivery window entirely.
What Should You Check Before the Stager Arrives?
A cleanout clears the house. It doesn't automatically make it show-ready. Before your stager or photographer sets foot inside, work through this list:
- Remove oversized or worn furniture, duplicate items, obvious trash, family photos, and anything niche or highly personal that a buyer can't picture living around.
- Tuck away keepsakes, pet supplies, and any security equipment like cameras or alarm panels that shouldn't be visible in listing photos.
- Box and label items still under family review so they're out of sight but not lost in the shuffle.
- Request donation receipts for anything given to charity and keep a documented inventory. This matters for probate, not just goodwill.
- Flag salvageable pieces worth routing to an estate sale or consignment instead of a donation bin.
- Confirm the operational basics: utilities still on, locks changed if needed, insurance active, and any minor repairs scheduled before the stager's date.
A donation-first sorting process also cuts your hauling costs, since fewer items head to the dump, and it typically produces the tax paperwork heirs need later.
Pro Tip: Photograph every room before you remove anything. If a family member later asks where a specific item went, you'll have a record instead of a guessing game.
Where Should Staging Focus Room by Room?
Not every room needs the same attention. Buyers spend the most time mentally "living" in the entry, the main living space, and the kitchen, so that's where staging dollars work hardest.
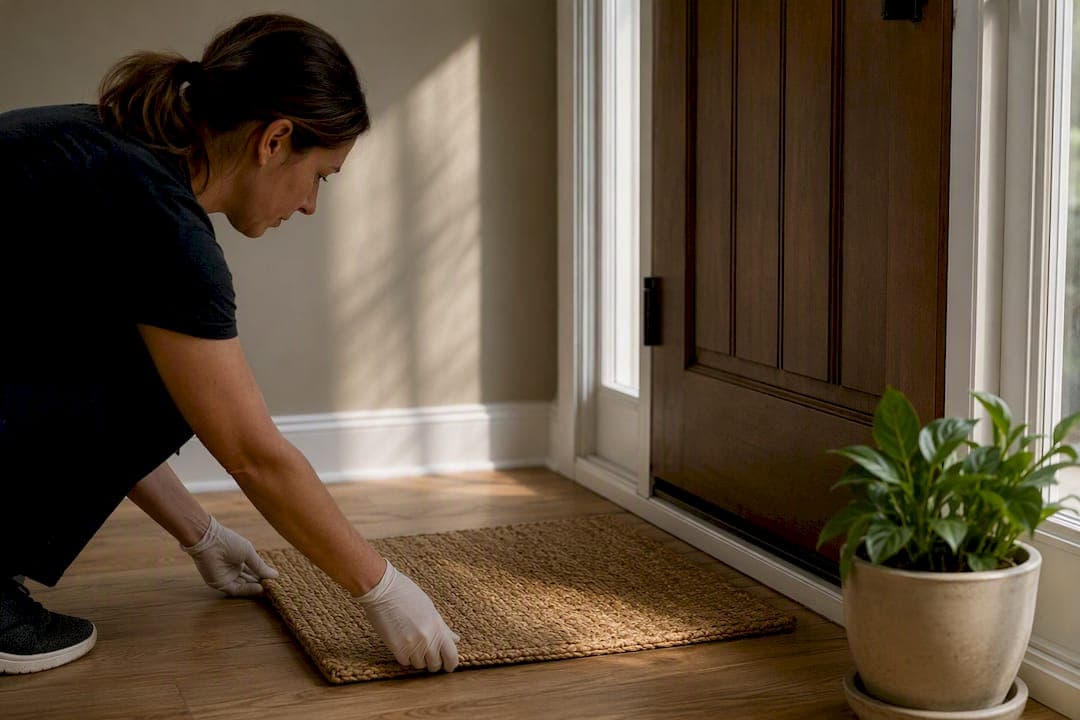
Entry and curb. Clear the walkway, remove any leftover yard debris from the cleanout, and add one planter or a simple welcome mat. This is the first photo in the listing, and it sets the tone for everything after it.
Living and dining rooms. Cut furniture down to what defines the space, not fills it. A single 9x12 rug and one seating vignette, a couch, a chair, a small table, does more than a full furniture set crammed into a room that now looks smaller than it is. Keep sightlines open from the entry through to the back of the house.
Kitchen. Clear counters to two or three items maximum. A wooden cutting board leaning against the backsplash and a bowl of fruit read as "lived in and cared for" without looking cluttered. If there's an island, add two stools to suggest a seating area.

Primary suite and bathrooms. Fresh linens, minimal decor, zero personalization. Swap mismatched bulbs so every fixture reads the same color temperature. Buyers notice inconsistent lighting even when they can't name what's bothering them.
Garage, attic, and closets. Storage sells houses. Clear these spaces down to roughly 70 to 80 percent full, enough to look organized and usable, not empty in a way that reads as staged. Remove any boxes still blocking the view of shelving or floor space.
Should You Choose Full, Partial, or Virtual Staging?
The right answer depends on your timeline and your budget, not on which option sounds most impressive. Vacant homes typically sell for less and sit longer than staged ones, because buyers struggle to picture how empty rooms function. But full staging isn't the only fix.
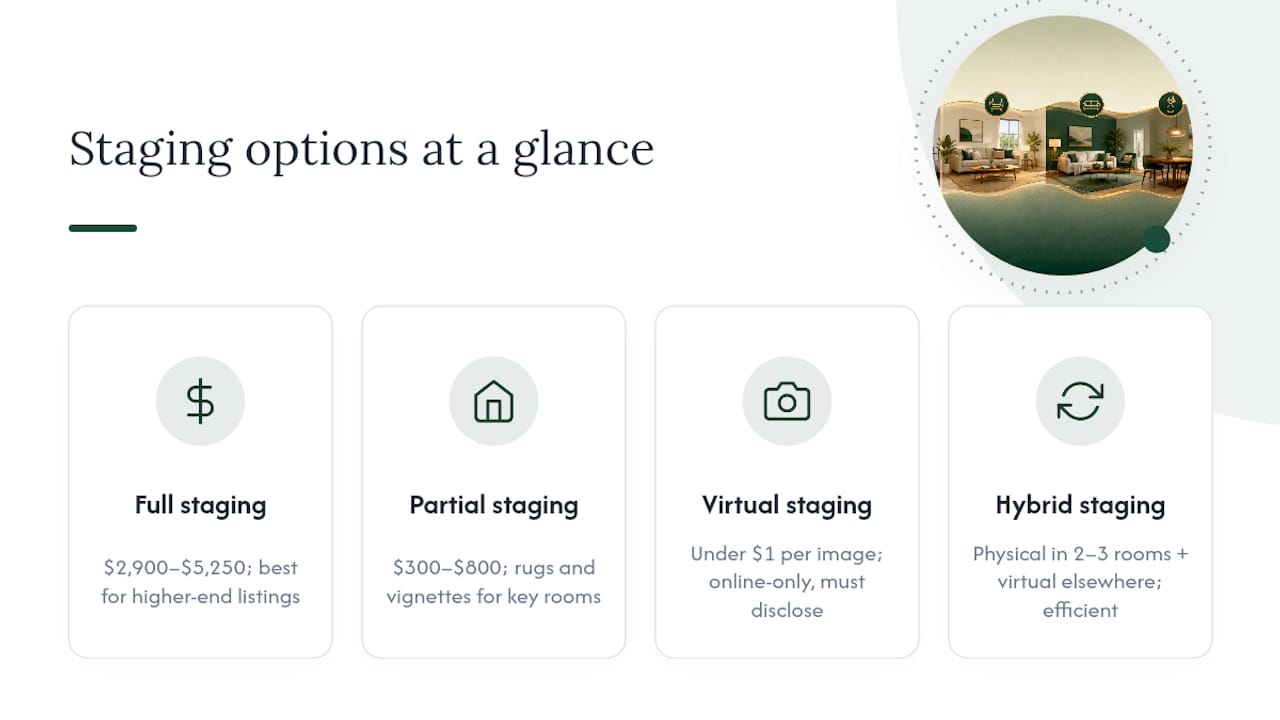
Full physical staging. Industry pricing from the Real Estate Staging Association puts a full vacant staging job in the range of $2,900 to $5,250 for an average home. This works best for higher-end listings where buyers expect a polished walkthrough.
Targeted physical touches. Rugs, a dining vignette, a few accessories, generally $300 to $800. This covers the rooms that matter most without renting furniture for the whole house.
Virtual or AI staging. Some virtual staging platforms run under $1 per image, making it the cheapest way to show a furnished look in online listings. The tradeoff is that it only helps online, not during in-person showings, and MLS rules generally require you to disclose that photos are virtually staged, both in the image caption and the listing description.
Hybrid approach. Physical staging in the two or three rooms buyers weigh most, virtual staging for the rest. This is often the most efficient use of a limited staging budget.
Who Do You Call First, and What Should You Keep?
Booking order matters as much as the sequence of work itself. Call your agent first, since they'll often have a preferred stager and photographer already on a schedule. Next comes the hauler or cleanout crew, then the cleaning service, then the stager, then the photographer last, once the space is fully ready.
- Give your agent and stager at least a week's notice for scheduling.
- Book photography only after staging is confirmed complete, not before.
- Collect itemized hauler receipts, donation receipts, inventory photos, and written handoff notes from every vendor.
- For compressed one-day turns, ask vendors to work back-to-back rather than simultaneously to avoid crews tripping over each other.
Keep every receipt and photo in one folder. If the property is going through probate, that documentation is often the difference between a smooth closing and a delayed one, since executors sometimes need proof of disposition for items removed from the estate.
How Does a Donation-First Cleanout Speed Up Staging?
A cleanout built around donation-first sorting doesn't just clear the house, it sets up the staging phase to move faster. Bereavement Cleanout Services runs a documented process: a sensitive walkthrough, donation-first sorting, inventory and photo documentation, then a broom-clean finish.
That sequence matters for what comes next. When usable furniture and décor get routed to donation instead of the landfill, the remaining space is genuinely empty and clean, not just cluttered differently. That reduces the physical staging a stager needs to bring in, and the inventory photos and donation receipts collected along the way become part of the probate paperwork families need anyway. Fewer surprises later, faster path to photo day.
What Belongs on Your Room-by-Room Staging Checklist?
A staging checklist works best when it covers furniture, lighting, and decor separately for each room, since skipping one usually shows up in photos.
Furniture placement. Anchor each room with one clear focal point, a bed, a sofa, a dining table, rather than filling every wall. Angle furniture slightly away from walls in larger rooms to create the sense of a functioning layout instead of a showroom.
Lighting. Replace any burned-out or mismatched bulbs before the photographer arrives. Aim for warm white bulbs (around 2700K to 3000K) throughout, since mixing warm and cool tones in the same shot reads as unfinished. Open blinds and turn on every light source during the shoot, including lamps that seem unnecessary in daylight.
Decor. Limit each surface to one or two items. A folded throw on a couch arm, a single piece of art per wall, one plant per room. Consistent style across rooms matters more than any individual piece, since buyers scrolling through listing photos notice when a farmhouse kitchen leads into a modern living room.
Bathrooms. Rolled towels, a single soap dispenser, nothing personal on the counter.
Bedrooms. Made bed with neutral bedding, nightstand with one lamp and one small object, closet doors closed.
Treat this as a walkthrough checklist the day before photography, not a one-time setup. Small things shift, a picture frame gets bumped, a towel falls, between staging day and shoot day.
How Do You Improve Curb Appeal After a Cleanout?
The exterior is the first photo in every listing and the first impression at every showing, and it's easy to overlook once the inside looks great. Junk removal playbooks consistently point to exterior cleanup as one of the fastest ways to lift a listing's first impression, since it's often the cheapest fix relative to the visual payoff.

Start with anything left behind from the cleanout itself, old furniture at the curb, discarded boxes, a dumpster that hasn't been picked up yet. None of that should still be visible once staging begins.
From there, work through the basics: mow and edge the lawn, clear leaves and debris from walkways and gutters, and pressure wash the driveway and front steps if they've collected grime. Trim overgrown shrubs away from windows and the front door. A fresh coat of paint on the front door, one that stands out slightly from the trim, is one of the cheapest upgrades that photographs well.
Add one or two planters near the entry with simple, seasonal greenery rather than a full landscaping overhaul. Check exterior light fixtures for burned-out bulbs, since twilight photos are increasingly common in listings and a dark porch light kills that shot. If house numbers are faded or missing, replace them. It's a five-dollar fix that shows up in every exterior photo.
Finally, walk the exterior at the same time of day your photographer plans to shoot. Shadows and glare change dramatically between morning and afternoon, and what looks fine at noon might wash out completely in late-day sun.
What Staging Mistakes Cost Sellers the Most?
The most expensive mistake is staging before the house is actually clean and repaired. Furniture and decor can't hide a dirty grout line or a scuffed wall in a well-lit photo, and reshooting after the fact costs both money and calendar time you don't get back.
Overfurnishing is a close second. Sellers who just finished a cleanout sometimes overcorrect by bringing too much back in, trying to make rooms feel "warm" again. The opposite works better: buyers need to see the room's proportions, not compete with someone else's furniture arrangement for visual space.
Ignoring odor is another common miss, tied closely to staging quality since a musty smell undercuts even a beautifully staged room the moment a buyer walks in.
Mismatched staging style across rooms confuses buyers scrolling listing photos, an issue design guidance flags directly: cohesive style across rooms reads as intentional, while switching between farmhouse, modern, and traditional room to room reads as thrown together.
Skipping documentation during the donation and disposal phase is a mistake that doesn't show up until much later, usually during probate, when someone asks for proof of what happened to specific items.
And finally, staging every room equally wastes budget. Not every room needs a full setup. A guest bedroom used mainly for storage can stay simple; the living room and kitchen deserve the attention.
How Do You Neutralize Odors and Improve Ambiance After a Cleanout?
Even a spotless cleanout can leave behind smells that linger in carpets, curtains, and HVAC systems, especially in homes that sat closed up for a while. Odor is one of the fastest ways to undercut an otherwise well-staged home, since buyers register smell before they register decor.
Start with the HVAC system. Replace the air filter and, if the ductwork hasn't been cleaned in years, consider having it serviced. Odors trapped in ducts get redistributed through the house every time the system runs.
Deep clean carpets and rugs rather than just vacuuming them. If carpet has absorbed years of odor, a professional cleaning, or in some cases replacement, tends to outperform any spray or plug-in deodorizer. A thorough deep clean of a vacant home typically covers baseboards, window tracks, and inside cabinets, spots that trap odor and dust long after the visible clutter is gone.
Open windows for a few hours daily in the week before photos, weather permitting, to air the house out naturally rather than masking smells with heavy fragrance. Buyers are often suspicious of a home that smells strongly of air freshener, since it can read as an attempt to hide something.
For ambiance during showings, simple touches work better than scented candles: warm lighting, open blinds, and a house at a comfortable temperature do more to make a space feel welcoming than any fragrance.
How Should You Handle Repairs Found During the Cleanout?
Cleanouts uncover things nobody expected: water stains behind furniture, a section of flooring damaged under a rug, outlets that don't work once a heavy bookshelf finally moves. The instinct is to note it and deal with it later. Don't.
Sort what you find into two categories: cosmetic and structural. Cosmetic issues, scuffed paint, a cracked switch plate, a loose cabinet handle, are quick, cheap fixes that should happen during the deep clean and repair window, before staging begins. Structural issues, water damage, electrical problems, anything involving plumbing, need a licensed professional and should be addressed even if it pushes your timeline back.
Get a second opinion on anything ambiguous, especially water stains. What looks like an old, dried leak might be an active one, and staging over it without checking is a mistake buyers' inspectors will eventually catch anyway. If the estate is in probate, document the repair with photos and receipts. It matters both for insurance purposes and for keeping heirs informed about what money went where.
Prioritize repairs that show up clearly in photos over ones that don't. A dented wall in the primary bedroom matters more right now than a squeaky hinge in a hall closet nobody photographs. Once the visible repairs are done, staging can proceed without the risk of a reshoot later.
A Note From Derek
The hardest part of this process usually isn't logistics, it's emotional weight slowing down decisions that need to move fast. Delegate the heavy-lift sorting where you can, keep your donation and inventory receipts organized, and lean on professionals for the parts that don't require your judgment call. If you'd rather hand off the cleanout entirely, reaching out for a walkthrough is a reasonable next step.
— Derek
How Bereavement Cleanout Services Prepares a House for Staging
Bereavement Cleanout Services is built for exactly this handoff: a documented, donation-first cleanout that leaves a house broom-clean and ready for a stager, not just emptied out.

Every job includes sensitive, family-first sorting, inventory photos and documentation for probate, and insured crews who can move on a tight schedule when a listing date is already set. That documentation does double duty. It supports the estate paperwork families need and it shortens the time between cleanout and photography, since less has to be sorted, hauled, or second-guessed once the stager arrives. Response times run fast across New Jersey and New York, which matters most when a realtor needs a turnover completed in days, not weeks. If your property needs a cleanout before it can be staged, request a walkthrough and quote and get a firm timeline for when the house will be ready for the next step.
Sources
For deeper detail on the topics covered here, the NAR probate cleanout guide covers sequencing for estate sales, Zillow's staging guide breaks down cost ranges, and Redfin's vacant home staging piece explains the pricing impact of an unstaged listing. AARP's guide to selling a parent's home covers probate documentation in more depth.