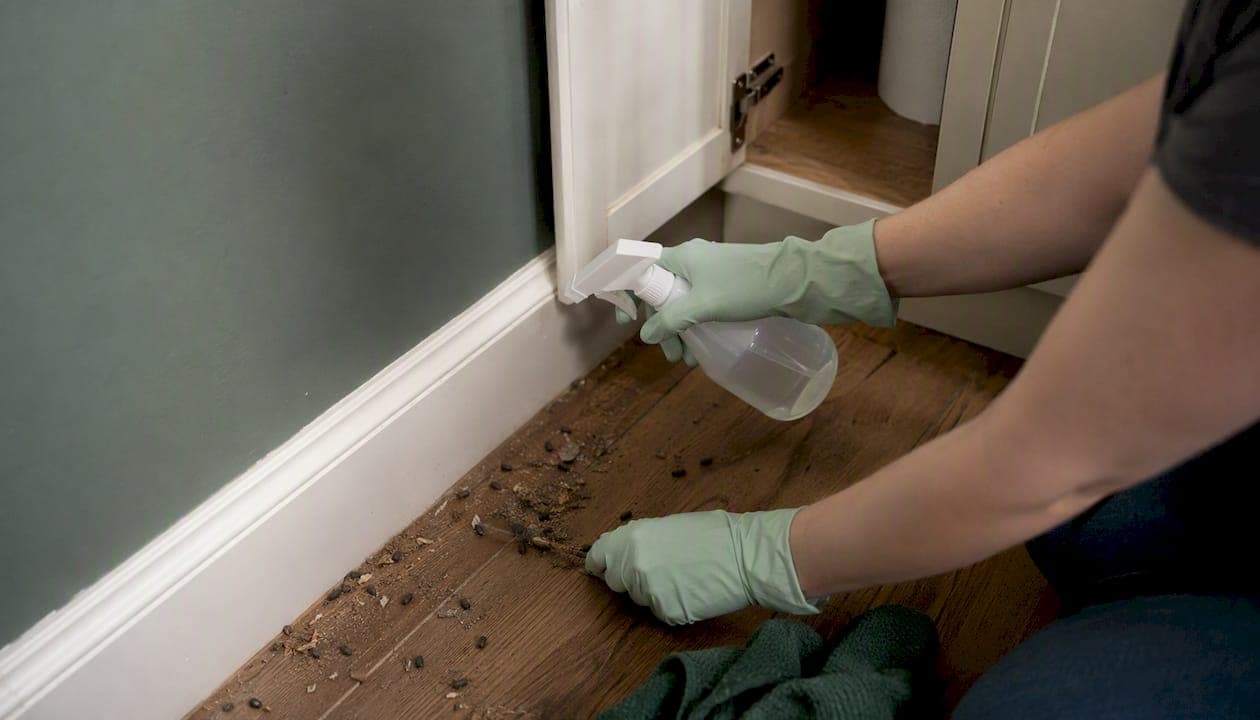
If you find mouse droppings, stop and do not sweep or vacuum them. Open windows and doors immediately, let the area air out for at least 30 minutes, then put on rubber or nitrile gloves and a mask before you touch anything. Spray the droppings thoroughly with an EPA-registered disinfectant or a fresh bleach solution, wait at least 5 minutes (or longer if the label recommends), then wipe up with paper towels and seal everything in a double-bagged plastic bag. That sequence, drawn directly from CDC cleanup guidance, is the safest way to handle rodent feces removal without putting your family at risk.
Immediate steps to take in the next 30 minutes:
- Open all windows and doors in the affected room and leave the area while it airs out.
- Do NOT sweep, dust, or vacuum dry droppings under any circumstances.
- Put on disposable gloves and a mask before re-entering.
- Spray droppings with disinfectant until visibly soaked; wait at least 5 minutes.
- Wipe up with paper towels, place in a plastic bag, seal it, and place that bag inside a second bag.
- Wash hands thoroughly with soap and warm water for at least 20 seconds.
Safety rule #1: Never sweep or vacuum dry mouse droppings. Doing so sends virus-containing particles airborne, creating an inhalation risk for hantavirus and other rodent-borne pathogens. Wet first, always.
Table of Contents
- Before you touch anything: ventilation, wait times, and PPE
- Which disinfectants work and how to use them correctly
- Step-by-step: how to clean mouse droppings from hard surfaces
- Cleaning carpets, upholstery, clothing, and other surfaces
- Safe removal of dead rodents and nests
- When you should hire a professional instead of doing it yourself
- Key Takeaways
- The part of rodent cleanup most guides skip
- Bereavementcleanoutservices handles the cleanouts you should not do alone
- Useful sources for more detail
Before you touch anything: ventilation, wait times, and PPE
Ventilation is not optional. Open every window and door in the affected space and step away for a full 30 minutes before you re-enter to clean. Cross-ventilation, where air moves through from one side to the other, clears the room faster than cracking a single window. If sunlight reaches the area, that helps too: CDC research confirms that ultraviolet rays inactivate hantaviruses, so a sun-lit room is meaningfully safer than a dark one.
When to wait longer. If you have been actively trapping rodents, continue trapping for about a week. After the last capture, wait roughly five days before doing any deep cleaning of enclosed spaces like attics or crawlspaces. Active rodents mean active contamination, and cleaning too soon just exposes you to fresh material.
Personal protective equipment you actually need:
- Gloves: Rubber, latex, vinyl, or nitrile disposable gloves. Nitrile is the most puncture-resistant and the easiest to find at hardware stores.
- Mask: A standard dust mask does NOT protect against viruses. For light cleanup, an N95 respirator is the minimum effective option. For heavy contamination, a half-face respirator with P100 filters is better.
- Eye protection: Safety glasses or goggles for heavy work or enclosed spaces where spray can reach your face.
- Clothing: Wear clothes you can wash immediately afterward, or disposable coveralls for attic/crawlspace work.
Supplies to gather before you start:
- Spray bottle or pump sprayer filled with disinfectant solution
- Roll of disposable paper towels
- Heavy-duty plastic garbage bags (at least two)
- Nitrile gloves and N95 mask
- Hand soap and access to warm running water
Pro Tip: Put gloves on before touching anything in the contaminated area, and remove them by peeling them inside-out from the wrist so the contaminated surface stays contained. Wash your hands immediately after removal, even if the gloves looked intact.
Which disinfectants work and how to use them correctly
The EPA maintains a list of registered disinfectants appropriate for viral pathogens. Choosing a product from that list is the most reliable way to confirm you are using something with proven efficacy. Read the label before you spray: contact time, dilution, and surface compatibility vary by product, and skipping that step is where most homeowners go wrong.
If you do not have an EPA-registered product on hand, a bleach solution works. Mix 1 part household bleach with 9–10 parts water, following NPS and CDC dilution guidance. Make it fresh every day; diluted bleach loses potency quickly and a day-old solution may not disinfect effectively.
Key rules for applying disinfectant:
- Spray until the surface or droppings are visibly saturated, not just misted.
- Allow a contact time of at least 5 minutes; some NPS protocols recommend 10 minutes for certain items. Follow whichever is longer: the label or these minimums.
- Never mix bleach with ammonia-based cleaners or any other household product. The combination produces toxic chloramine gas.
- Keep children and pets out of the area until surfaces are dry and the room has been re-ventilated.
- Bleach can discolor or damage some surfaces, including wood and certain fabrics. Test a small area first, or use an EPA-registered alternative.
Safety note: Disinfectants are pesticides. Use them only in ventilated spaces, avoid prolonged skin contact, and store them out of reach of children.
Step-by-step: how to clean mouse droppings from hard surfaces
Work from the inside of the contaminated area outward, and from top to bottom, so you are not dragging contamination across areas you have already cleaned. This sequencing principle comes from professional cleanup protocols used by trained crews on heavy infestations and applies just as well to a kitchen cabinet or pantry shelf.
- Ventilate and put on PPE. Open windows, wait 30 minutes, then glove up, mask up, and re-enter. Do not skip the wait.
- Saturate droppings with disinfectant. Spray generously until every dropping is wet. Wait at least 5 minutes, or longer if the product label or specific protocol recommends.
- Wipe up with paper towels. Pick up the soaked droppings using paper towels, working carefully to avoid spreading material. Place the used towels directly into a plastic bag.
- Seal and double-bag. Tie the first bag closed, then place it inside a second bag and tie that one too. This double-bag method prevents leaks and reduces secondary contamination risk.
- Dispose and disinfect tools. Place the sealed bags in your regular outdoor trash. If you used reusable gloves, soak them in disinfectant before removing. Wash all reusable tools with disinfectant solution.
- Mop or wipe the entire surface. After removing visible droppings, mop hard floors or wipe shelves with fresh disinfectant. Wipe a wider area than what you can see: mouse urine is invisible under normal light and often extends well beyond the visible droppings.
- Wash hands thoroughly. Soap and warm water for at least 20 seconds, including under fingernails, even if your gloves felt secure throughout.
Pro Tip: A UV or black light flashlight reveals dried mouse urine as a faint blue-white glow. Run it across the floor and shelves before you mop so you know exactly how far to clean.
After cleanup, disinfect these surfaces too:
- Cabinet interiors and shelf edges near droppings
- Any food packaging that was in the area (discard open packages)
- Countertops, drawer pulls, and door handles in the room
- The exterior of your trash can if bags touched it
Cleaning carpets, upholstery, clothing, and other surfaces
Hard floors are straightforward. Porous surfaces require a different approach, and some materials are better discarded than cleaned.
| Surface | Recommended action | When to call a pro |
|---|---|---|
| Carpet / rugs | Soak with disinfectant, then steam-clean or shampoo with a disinfectant-grade cleaner | Heavily soiled carpet or large infested area |
| Upholstered furniture | Spray with disinfectant, steam-clean; discard if heavily contaminated | Structural contamination or large nesting sites inside cushions |
| Clothing / bedding | Machine-wash in hot water with detergent; machine-dry on high heat or air-dry in direct sunlight | Not typically needed |
| Cardboard / paper | Discard contaminated cardboard; quarantine fragile papers | Irreplaceable documents with heavy contamination |
| Vehicle interiors | Ventilate, spray hard surfaces, wipe; steam-clean fabric seats | Nesting inside vents or under seats |
| HVAC / ductwork | Do not run forced-air systems before cleaning; consider professional duct cleaning | Any suspected contamination inside ducts |
Clothing and bedding. Handle contaminated laundry with gloves. Wash in the hottest water the fabric allows, with regular detergent, and dry on high heat. Air-drying in direct sunlight is a legitimate alternative: UV exposure reduces infectivity.
Cardboard boxes. Discard them. Cardboard is porous, cannot be effectively disinfected, and is a preferred nesting material for mice. Do not try to salvage contaminated cardboard.
Fragile or non-washable items. Papers, photographs, and delicate objects that cannot be wet-cleaned can be quarantined. Place them in direct sunlight for several hours, or leave them in a rodent-free indoor space for about one week. CDC data confirms that hantaviruses generally remain infectious for only about 2–3 days in the environment, so a week-long quarantine provides a meaningful safety margin.
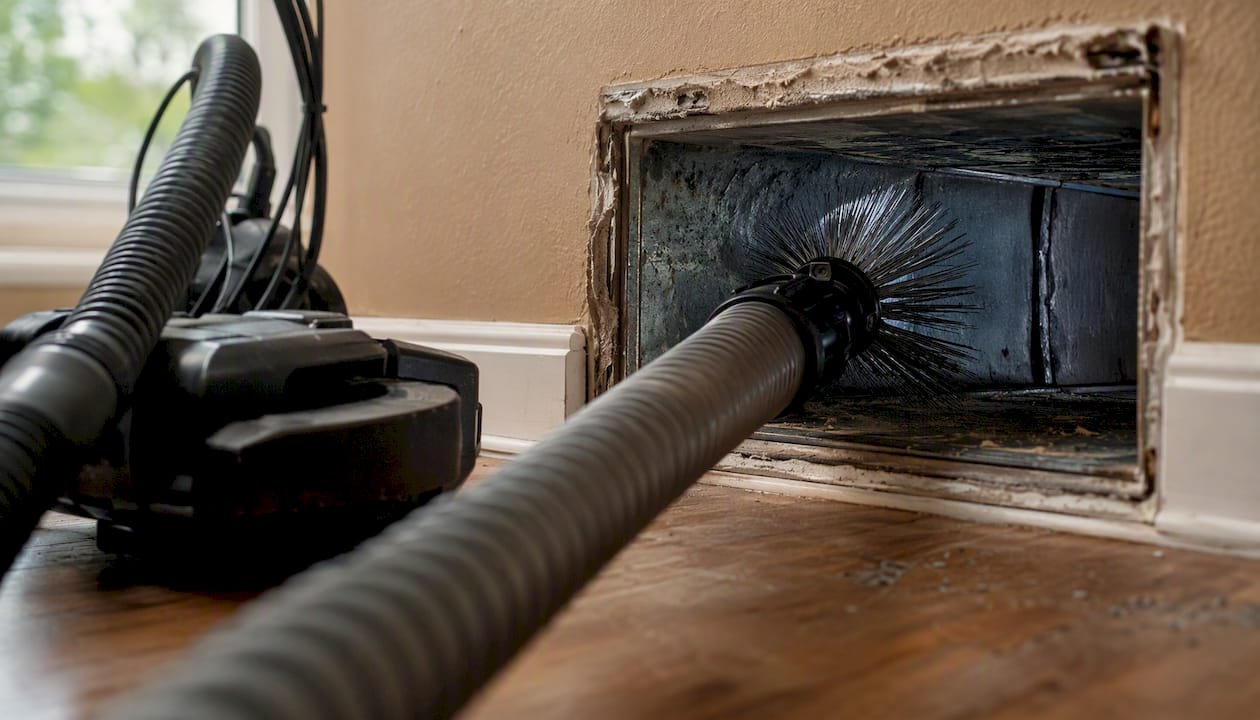
HVAC systems. Do not run your heating or air conditioning before cleaning the affected area. Forced air can spread contaminated particles through the entire home. If you suspect mice have been inside ductwork, professional duct cleaning is the right call.
Safe removal of dead rodents and nests
A dead mouse or a nest carries the same contamination risk as fresh droppings, sometimes more, because nesting material can be dense with dried urine and feces. The removal method matters as much as the disinfectant.
- Spray the carcass or nest thoroughly. Saturate with disinfectant and let it sit for at least 5 minutes (or longer following product label instructions) before touching anything.
- Use the invert-a-bag technique. Place your gloved hand inside a plastic bag as if it were a glove. Pick up the carcass or nest material while pulling the bag over it and inverting it so the contaminated material ends up inside the bag. Seal the bag.
- Double-bag immediately. Place the sealed bag inside a second bag, tie it, and place in outdoor trash.
- Disinfect the area. Spray the spot where the carcass or nest was sitting and wipe clean with paper towels, then bag and discard those too.
- Clean reusable traps. Spray snap traps with disinfectant, let them soak, then rinse. If a trap is heavily soiled or damaged, discard it in a sealed bag rather than trying to clean it.
Pro Tip: For nests in enclosed spaces like wall voids or under insulation, do not pull material out with your bare hands or a dry brush. Spray first, wait, then use long-handled tongs or a scooping tool to transfer material directly into a bag.
Trap hygiene:
- Disinfect reusable traps after every catch before resetting.
- Wear gloves every time you handle a trap, even an empty one.
- Dispose of glue traps in a sealed bag after each use; they cannot be safely cleaned.
When you should hire a professional instead of doing it yourself
Most single-room cleanups with a handful of droppings are manageable as a DIY project when you follow the steps above. But some situations genuinely require trained professionals with specialized equipment.
Signs that DIY is not enough:
- Droppings cover a large area or multiple rooms.
- You find contamination in insulation, inside wall cavities, or throughout an attic or crawlspace.
- The property has been vacant for weeks or months with an active infestation.
- Anyone in the household is immunocompromised, pregnant, or has a respiratory condition.
- You cannot identify or seal the entry points, meaning rodents are still actively entering.
What professional cleanup crews provide:
- HEPA-filtered vacuums and containment barriers to prevent cross-contamination.
- Full respiratory protection programs, including supplied-air or P100 respirators.
- Structural remediation, including removal and replacement of contaminated insulation.
- Certified waste disposal and documentation for landlords, estate matters, or insurance claims.
- Post-clean verification to confirm contamination has been fully addressed.
For pest control prevention tips and guidance on sealing entry points before or after cleanup, a licensed pest control professional can assess your home's vulnerabilities and recommend targeted exclusion work.
Pro Tip: When hiring a cleanup contractor, ask specifically whether they follow CDC or OSHA guidelines for rodent remediation, whether their crew uses HEPA equipment, and whether they carry liability insurance. A written scope of work and a post-clean report protect you.
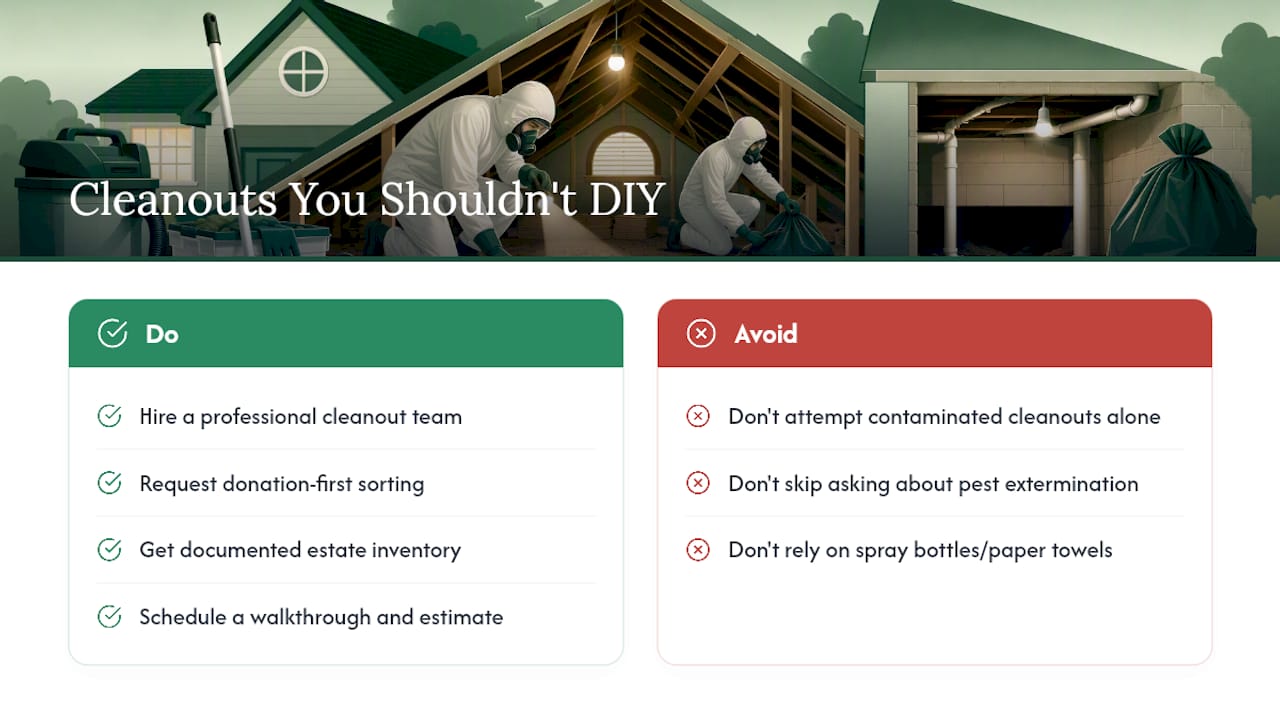
When Bereavementcleanoutservices is the right call. If the contamination is part of a larger cleanout situation—such as a vacant estate, a hoarded property, or a rental unit unoccupied for an extended period—a general cleanup crew may not be equipped to handle the combination of rodent waste, accumulated belongings, and sensitive possessions. That is where a full-service estate and home cleanout team adds real value.
Key Takeaways
Safe mouse droppings cleanup requires ventilation before entry, disinfectant contact time before wiping, and double-bagging all waste to prevent secondary contamination.
| Point | Details |
|---|---|
| Never sweep or vacuum | Dry droppings release airborne particles; always wet with disinfectant first and wait at least 5 minutes before cleaning. |
| Ventilate for 30 minutes | Open doors and windows and leave the area before re-entering with PPE. |
| Use EPA-registered disinfectants | A 1:9–1:10 bleach-to-water solution made fresh daily is an effective alternative. |
| Double-bag all waste | Seal paper towels, droppings, and carcasses in one bag, then place that inside a second sealed bag. |
| Bereavementcleanoutservices for complex situations | For estate, hoarding, or long-vacant property cleanouts with rodent contamination, their insured New Jersey team handles waste removal, sorting, and documentation. |
The part of rodent cleanup most guides skip
There is a gap between what the safety guidelines say and what most homeowners actually do, and it is not the disinfectant step. It is the sequencing before cleanup even begins.
Most people who find mouse droppings reach for a paper towel or a broom within the first 60 seconds. The instinct to clean immediately is understandable, but it is the single most dangerous move in the entire process. The Family Handyman's guidance on this reinforces what the CDC has said for years: the dry disturbance of droppings is where the real exposure risk lives, not the droppings themselves once they are wet.
What also gets overlooked is the invisible contamination. Visible droppings are the easy part. Mouse urine, which carries the same pathogens and dries clear, can cover a far wider area than the droppings suggest. Cleaning only what you can see and calling it done is a common mistake that leaves a family re-exposed every time they open that cabinet or pantry.
The other thing worth saying plainly: for properties that have been vacant, inherited, or neglected, rodent contamination is rarely just a corner of the kitchen. It tends to be systemic. In those situations, the right answer is not a longer checklist. It is a professional team with the right equipment and the experience to assess the full scope before anyone starts cleaning.
Bereavementcleanoutservices handles the cleanouts you should not do alone
When a property has been vacant for months, when a loved one's home needs to be cleared after a loss, or when rodent contamination is woven through an entire space alongside years of accumulated belongings, the cleanup goes well beyond a spray bottle and paper towels.
Bereavementcleanoutservices is a fully insured New Jersey team built for exactly these situations. Their services include broom-clean handoffs, donation-first sorting of usable items, responsible disposal of contaminated materials, and documented estate inventories that hold up for probate and insurance purposes. They handle the odor and waste cleaning that makes a property safe and ready for the next step, whether that is a sale, a rental, or a family transition.
If the property also needs pest extermination, that is a separate contractor's scope, and the Bereavementcleanoutservices team will tell you that clearly upfront. What they do is the full cleanout: sorting, hauling, cleaning, and documentation, with the care that sensitive situations deserve.
Schedule a walkthrough and get a firm estimate before committing to anything. Reach out through bereavementcleanoutservices.com to get started.
This guide follows CDC and EPA guidance and is intended as general information, not medical or professional advice. For health concerns related to rodent exposure, contact your local health department or a qualified medical professional.
Useful sources for more detail
These are the primary official sources used to build this guide. Each one is worth bookmarking if you want to verify details or find region-specific guidance.
- How to Clean Up After Rodents | Healthy Pets, Healthy People | CDC
- Hantavirus prevention | CDC
- Hantavirus Pulmonary Syndrome — United States: Updated Recommendations for Risk Reduction (MMWR/CDC)
- Hantavirus fact sheet and light infestation cleaning guidance (NPS)
- Selected EPA-registered disinfectants | EPA
- Mouse Droppings: Avoid This Common Cleaning Mistake — Family Handyman